")
Installing VMware Tools on Ubuntu (Linux OS)
Manual Installation of VMware Tools on Linux Systems (Ubuntu)
Step 1:
To mount the VMware Tools ISO file from the CD-ROM to a directory, we first need to create a directory.

Press Enter.
Step 2:
After creating the directory to mount, we mount the ISO file from the CD-ROM into the directory we created.

Press Enter.
Navigate to /mnt/cdrom. When you press Enter, you should see a file like VMwareTools...tar.gz inside the directory. (I can’t display it here because I deleted it after installation.)
Step 3:
Next, I’ll copy this directory to /home/misp.

Press Enter to complete the copy process.
Step 4:
Navigate to the directory you copied (e.g., /home/misp) and extract the compressed file.
(The command for extraction may vary depending on whether it’s a tar, zip, 7zip file, and depending on the operating system.)
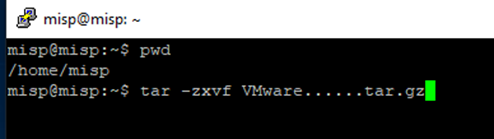
Press Enter
Step 5:
The extracted tar file will contain a folder named vmware-tools-distrib.
Navigate into this folder and run vmware-install.pl. After applying the following commands:

Press Enter.
Step 6:
During the installation, you’ll be asked questions like, “Should I copy this to this directory?” You can simply press Enter to accept all the default settings.

In the second-to-last paragraph, you should see a message indicating that the installation was successful. This means the installation is complete.
Step 7:
To verify that it is working:
At the bottom, you will see that VMware Tools is running.
Step 8:
To restart the service, use the following command:service vmware-tools restart
Press Enter to restart.
Step 9:
To check if it’s running, use the command:pgrep -fl vmtoolsd
Step 10:
If you want to install automatically:
For CentOS 5, 6, 7, 8 / Red Hat All Versions (except 3 and 4):yum install -y open-vm-tools
To verify:rpm -qi open-vm-tools
For Ubuntu All Versions:sudo apt-get install open-vm-tools
To verify:pgrep -fl vmtoolsd